

Coming from a Windows background I took the plunge recently and swapped to a Mac. This has given me the perfect opportunity to get into .NET Core! In this post I’m going to take you through getting everything you need to get setup and create your first app.
Prerequisites
Lets just go over a few things to get us started
.Net Core
Now we have chosen an editor the next thing we need to do is install .Net Core itself.
Regardless of which editor you choose this step will install the required command line tools or project templates to get started. Head over here to download the SDK and follow the installation steps.
NodeJS & NPM
Finally we need to install NodeJS and NPM which are found here. We need them both so we can install Yeoman, bower and any other packages in the future. Once installed run the following command.
npm install -g yo bower
Just for reference, Yeoman is a template generator and will be used to scaffold our .Net Core app.
Creating the Application with Yeoman
Now we need to install the ASP.Net Core template generator. This will be used by Yeoman to generate our application.
npm install -g generator-aspnet
For anyone unsure, the -g flag specifies that this package will be installed globally.
All thats left before we create our first app is to make a directory to put it in. I’m just going to create a directory in my Home folder and then move into it using the following commands.
mkdir hello-world
cd hello-world
The moment of truth is here, let’s fire the command to generate our app.
yo aspnet
You should be presented with some text asking if you want to submit some anonymous usage data, answer either yes or no. Next you’ll be asked what type of application you want to create, select Web Application Basic [without Membership and Authorisation].
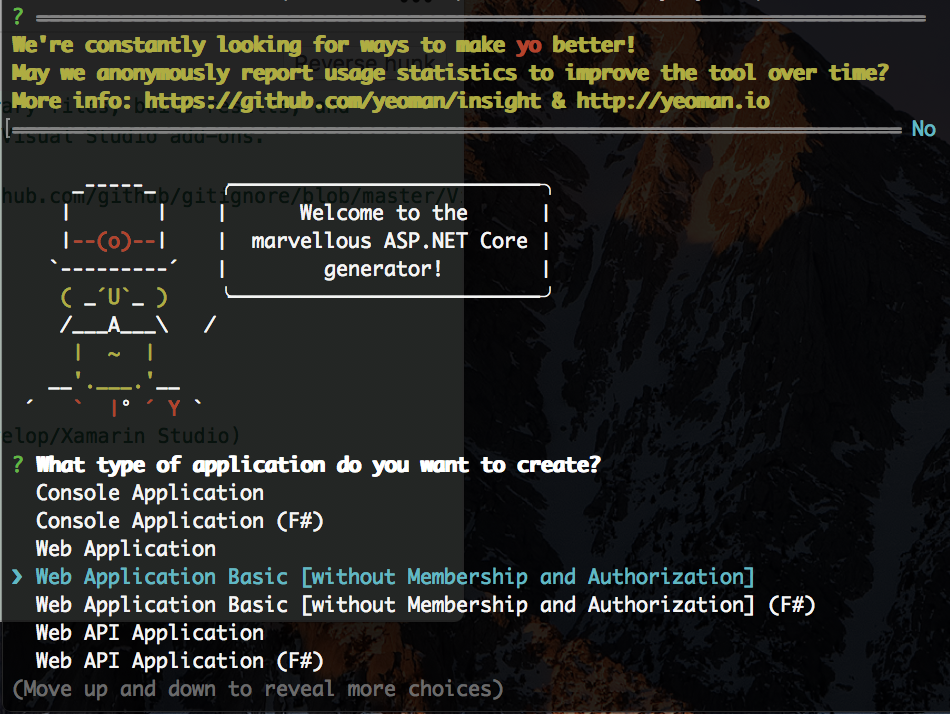
Then choose which UI framework you want to use, I went with Sematic UI purely because I’ve not used it before. But choose which ever framework you feel comfortable with.

Finally give your application a name, I’ve gone with the classic Hello World.

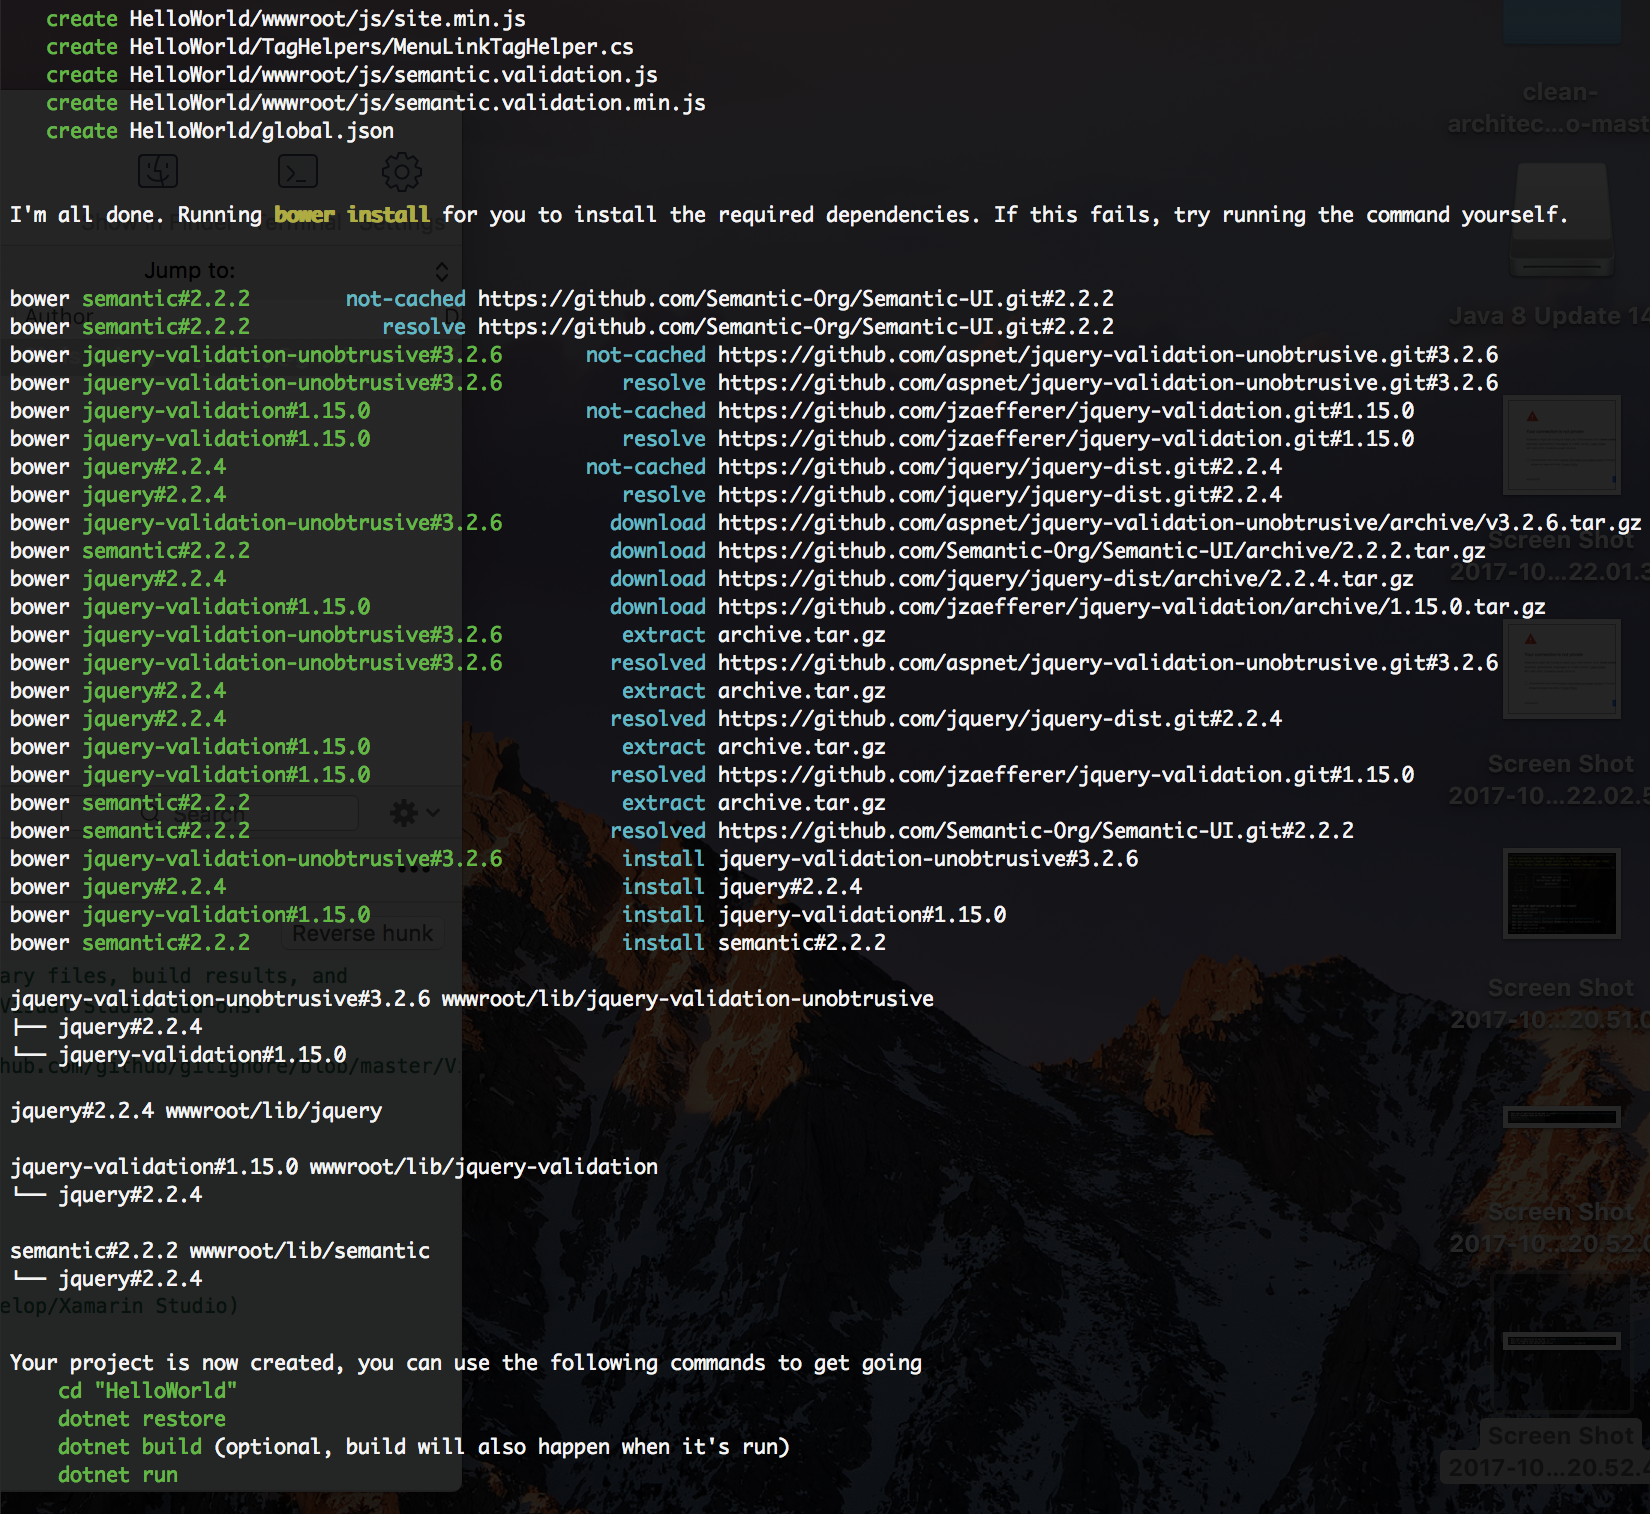
Once you have completed the above steps then Yeoman will go off and create the app. And you should then be left with some like the screenshot below.
Building & Running the App
We have been left us with some commands to run in order to get our application going. Let’s work through those and hopefully we should be able to view our shiny new app.
cd HelloWorld - Changes to the new application folder created by Yeoman.
dotnet restore - Restores all Nuget packages required by the application.
dotnet build - This is an optional step as the run command does a build anyway.
dotnet run - As mentioned above this builds everything then spins up a server on localhost port 5000 in order to view the app.
If all has gone according to plan you should see the following in the terminal.

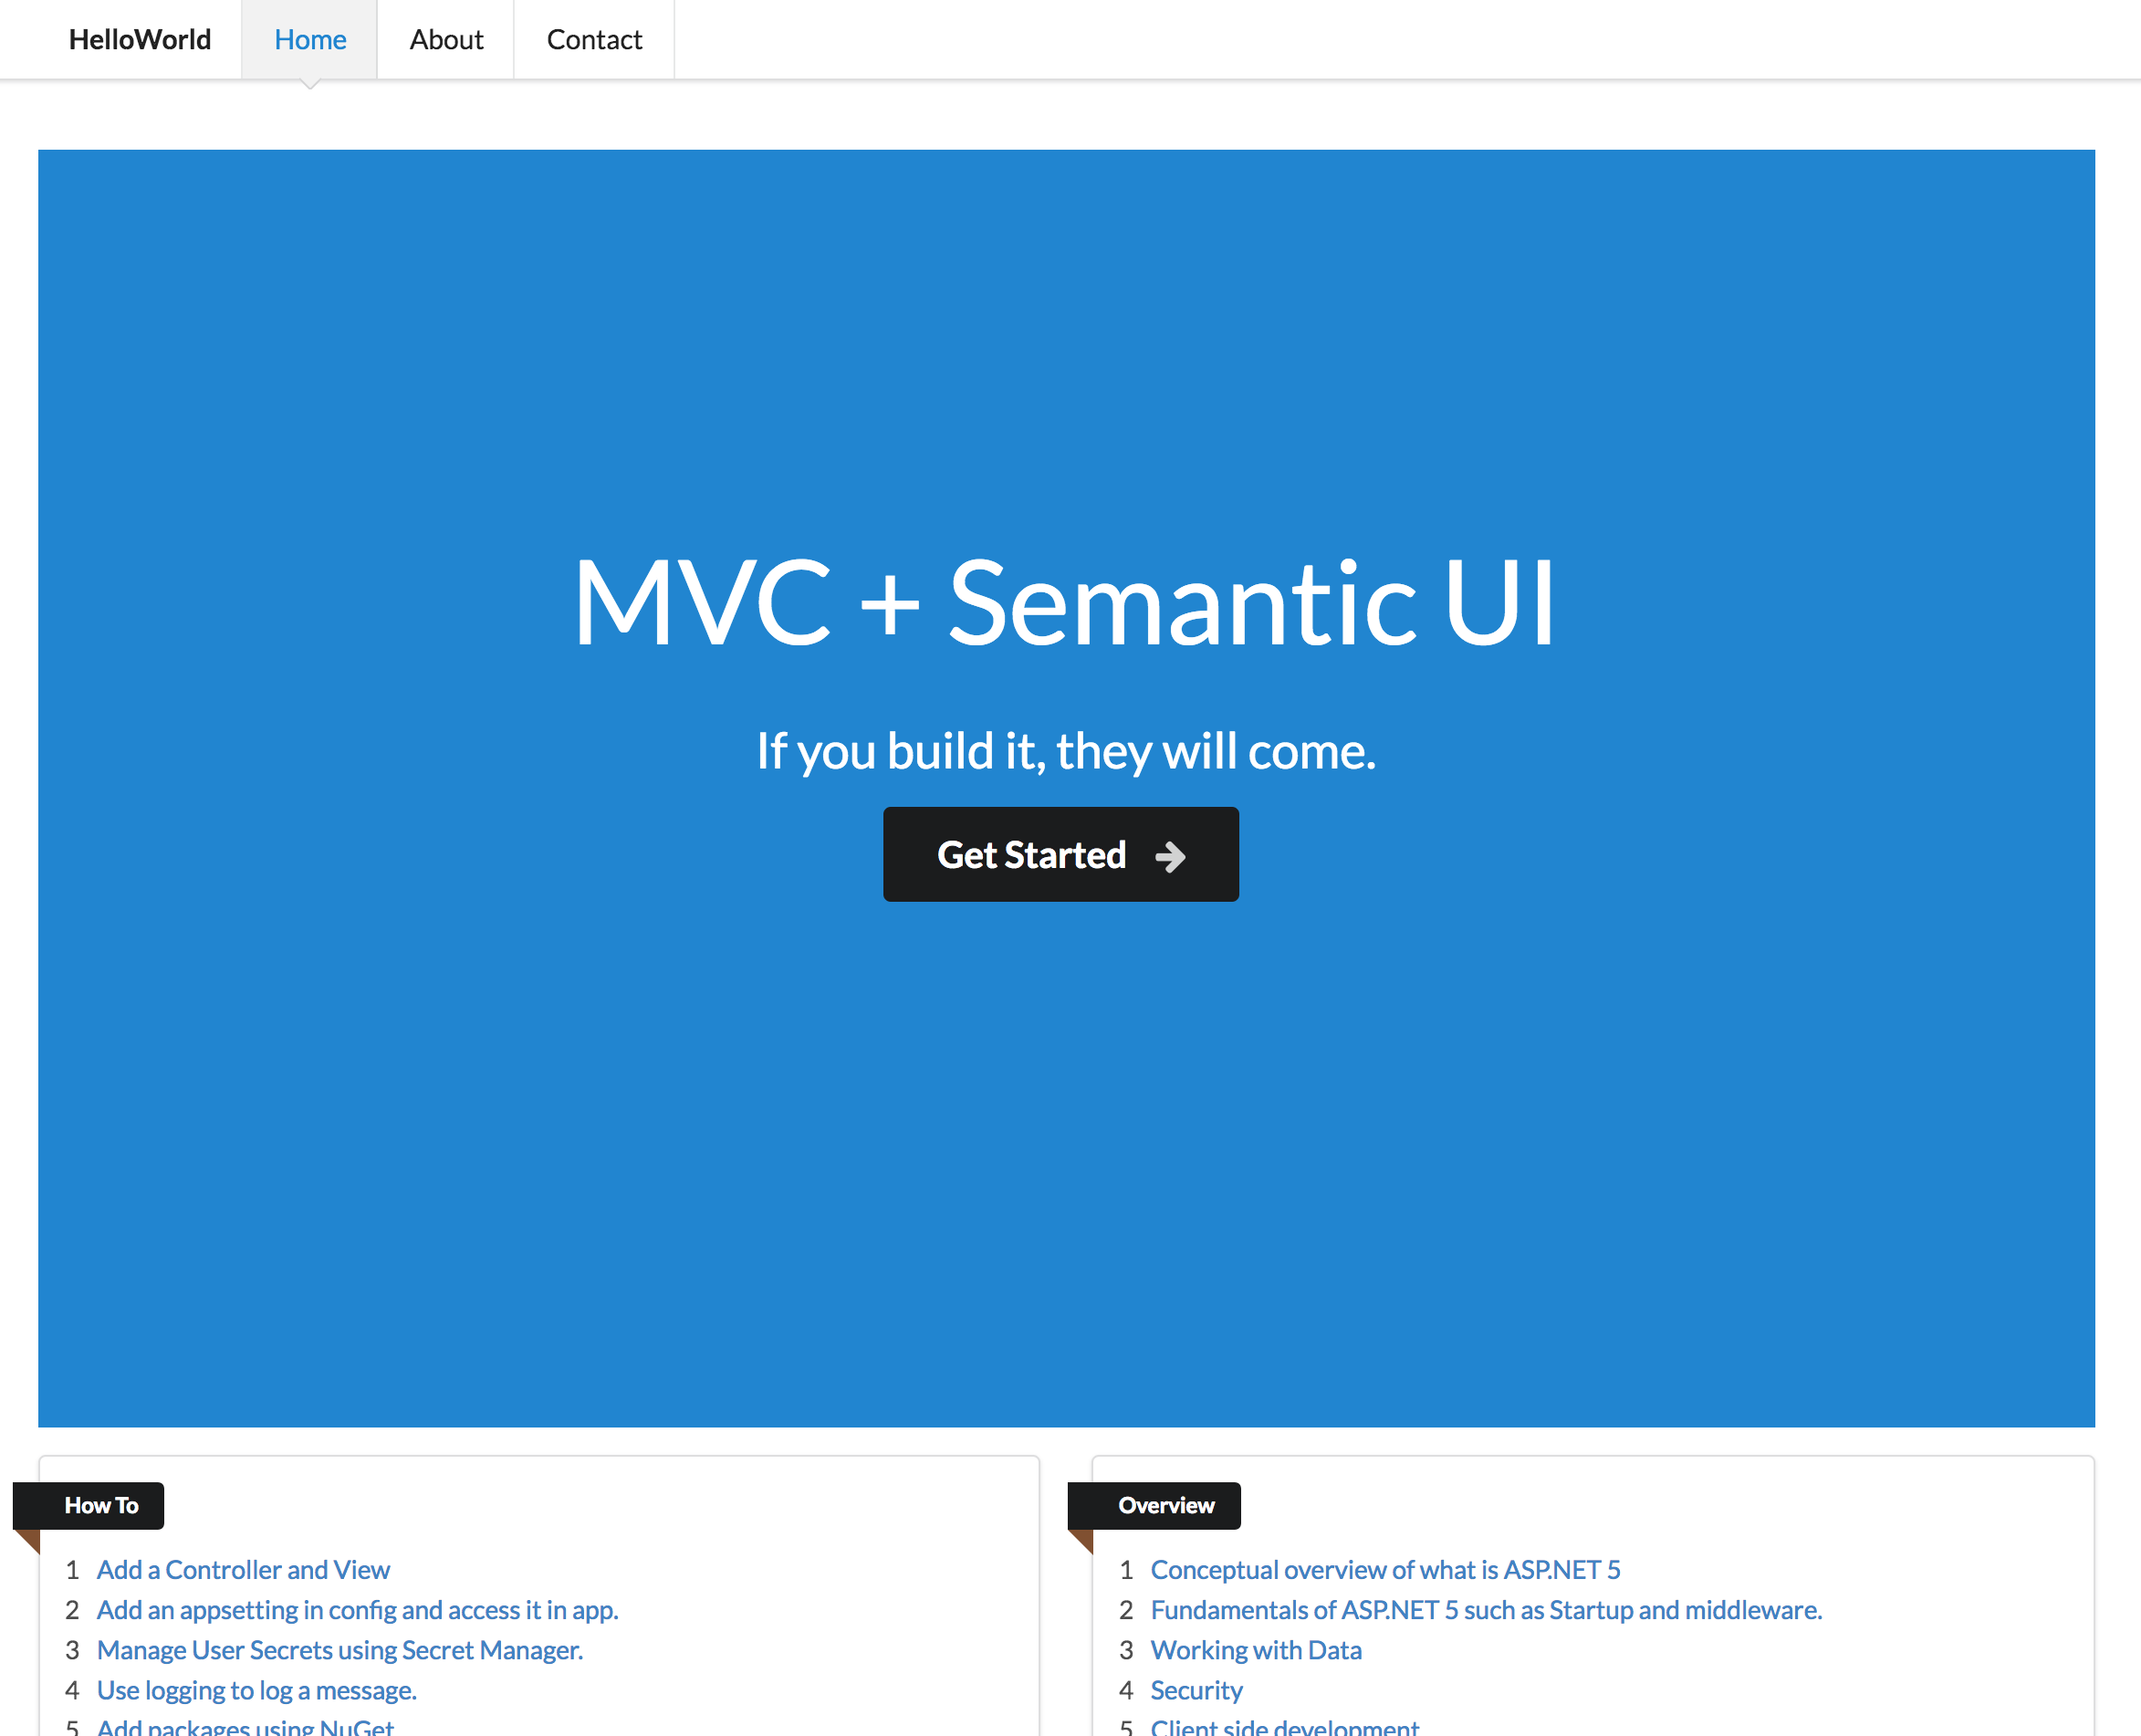
Open your favourite browser and navigate to http://localhost:5000 and you should be looking at your new ASP.Net Core Application.
Wrapping Things Up
So there you have it, a working ASP.Net Core application on Mac! I hope you found this post useful.
