

In the first half of this series, we covered how to containerise both Blazor Server and Blazor WebAssembly apps. In part 3, we automated that process using Azure Pipelines. We configured a CI pipeline which automatically builds code upon check-in to GitHub and publishes the Docker image to Azure Container Registry.
In this post, we’re going to learn how to deploy a Docker image from our container registry to an Azure App Service, which completes the cycle of development to release. We’re going to start by taking a look at the Web App for Containers service and why we would want to use it. Then we’ll create a Web App for Containers instance using the Azure Portal. Finally, we’ll create a build pipeline in Azure Pipelines to automate the deployment of our Docker image to that instance.
Web App for Containers - Introduction
Web App for Containers (WAC) is part of the Azure App Service platform. It allows us to “easily deploy and run containerised applications on Windows and Linux”. The service offers built-in load balancing and auto scaling as well as full CI/CD deployment from both Docker Hub and private registries such as Azure Container Registry.
It has never been easier to deploy container-based web apps…
Another great thing about this service is that it manages and maintains the underlying container orchestrator, so we can focus on building our apps - which I really like. Plus, you can even run multi-container apps now!
Creating a container instance in WAC
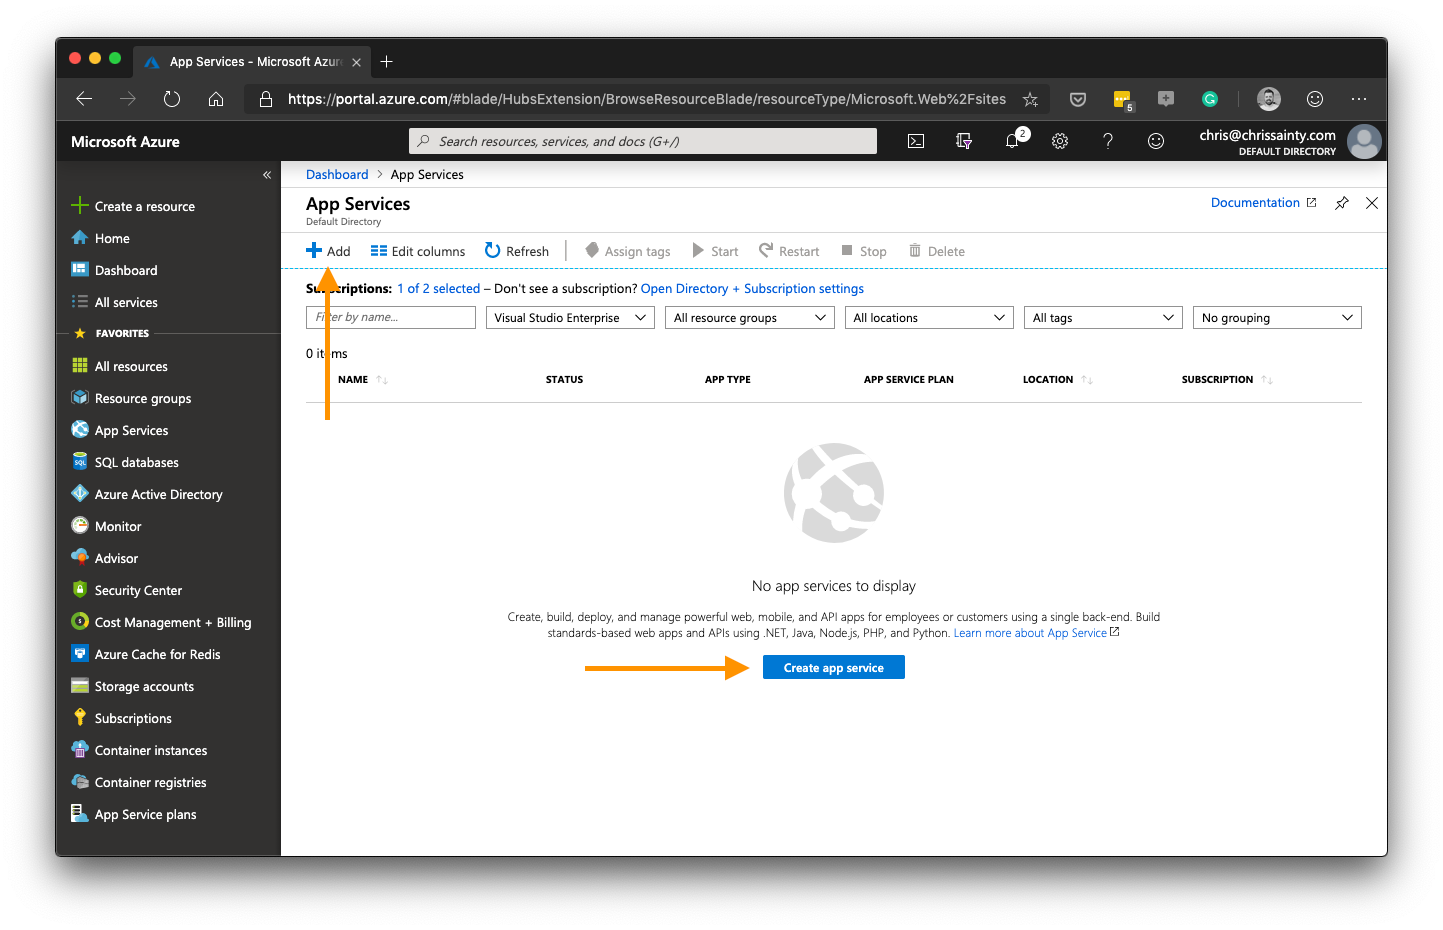
We’re going to start by walking through creating a container instance via the Azure Portal. Once you’re logged into your Azure account, go to App Services then click the Add button near the top of the blade or the Create app service button in the centre of the blade.
You’ll then see the Create app service blade. Start by selecting your subscription and resource group before moving on to the app service plan details section.
Give the instance a name, set the publish option to Docker Image and select the OS to use, then pick a region to host it. Finally either select an existing App Service Plan or create a new one if you wish.
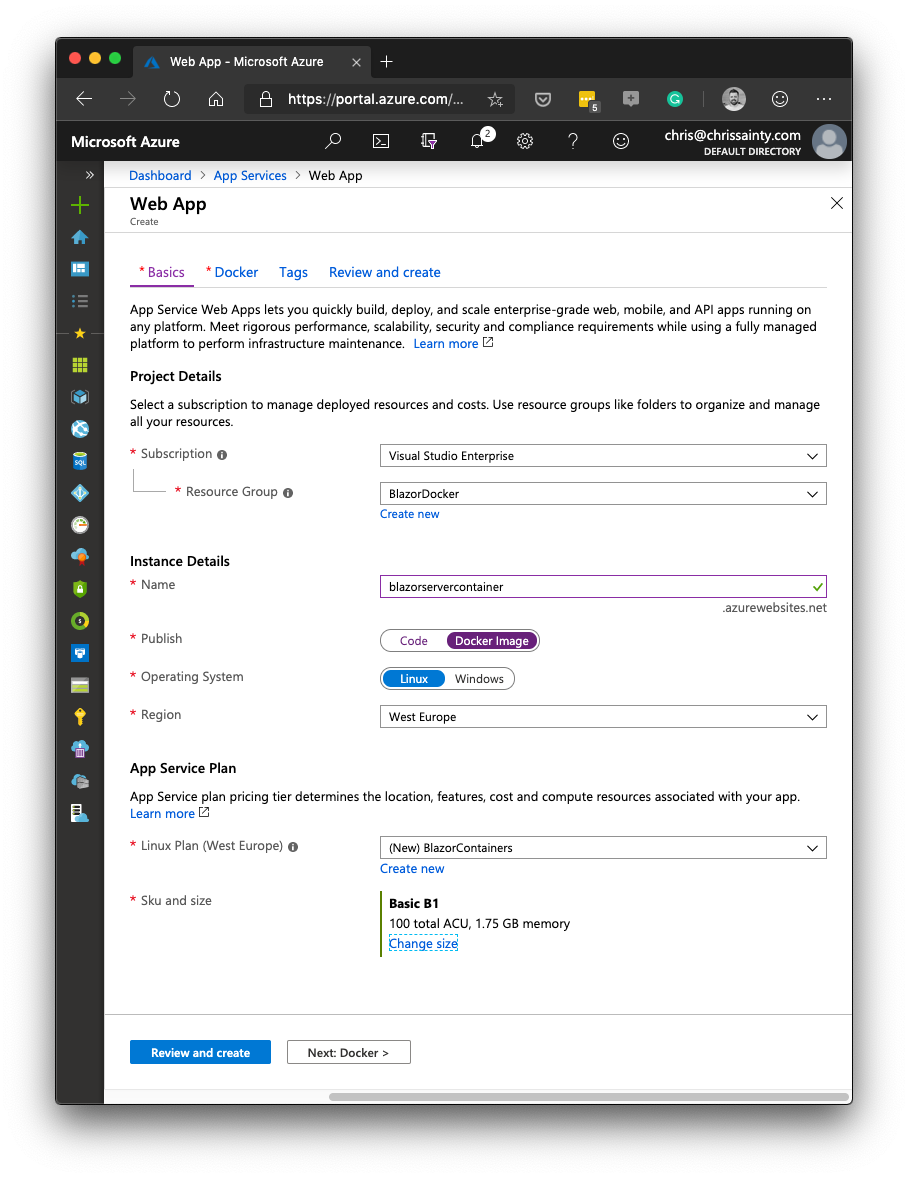
Once you’re done, click Next: Docker.
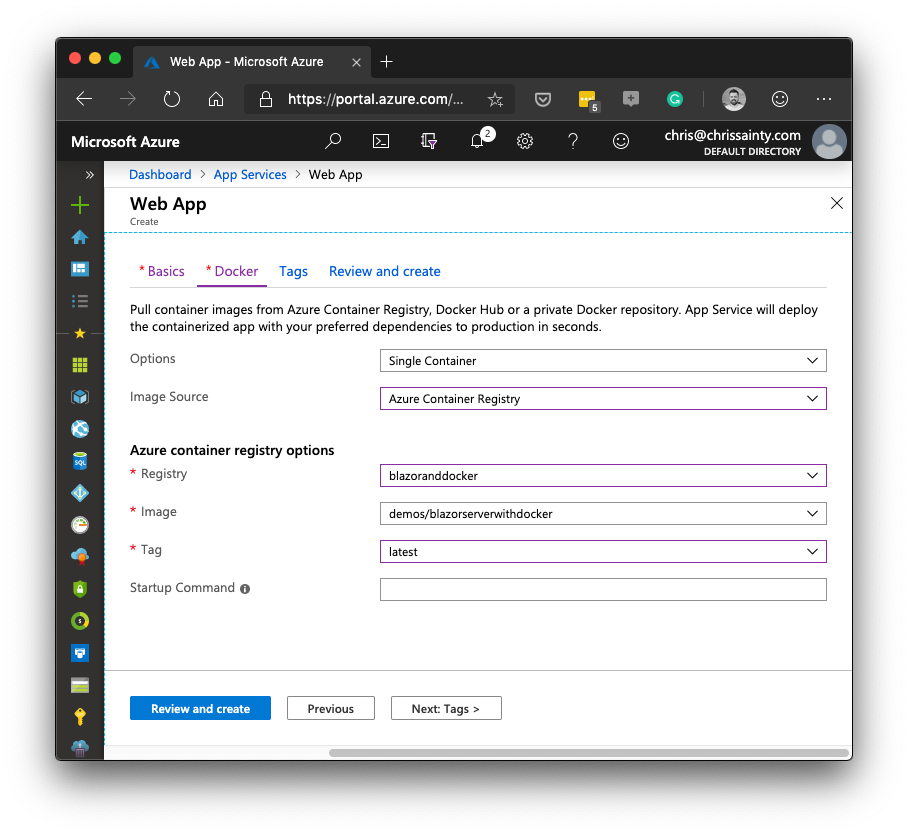
On this screen we can configure our container settings. We’re only deploying a single container to we can leave the first setting alone. For Image Source, select Azure Container Registry then fill in the Registry, Image and Tag.
When you’re happy, click Review and create. You’ll be presented with a summary screen, double check the details and then click Create to finish.
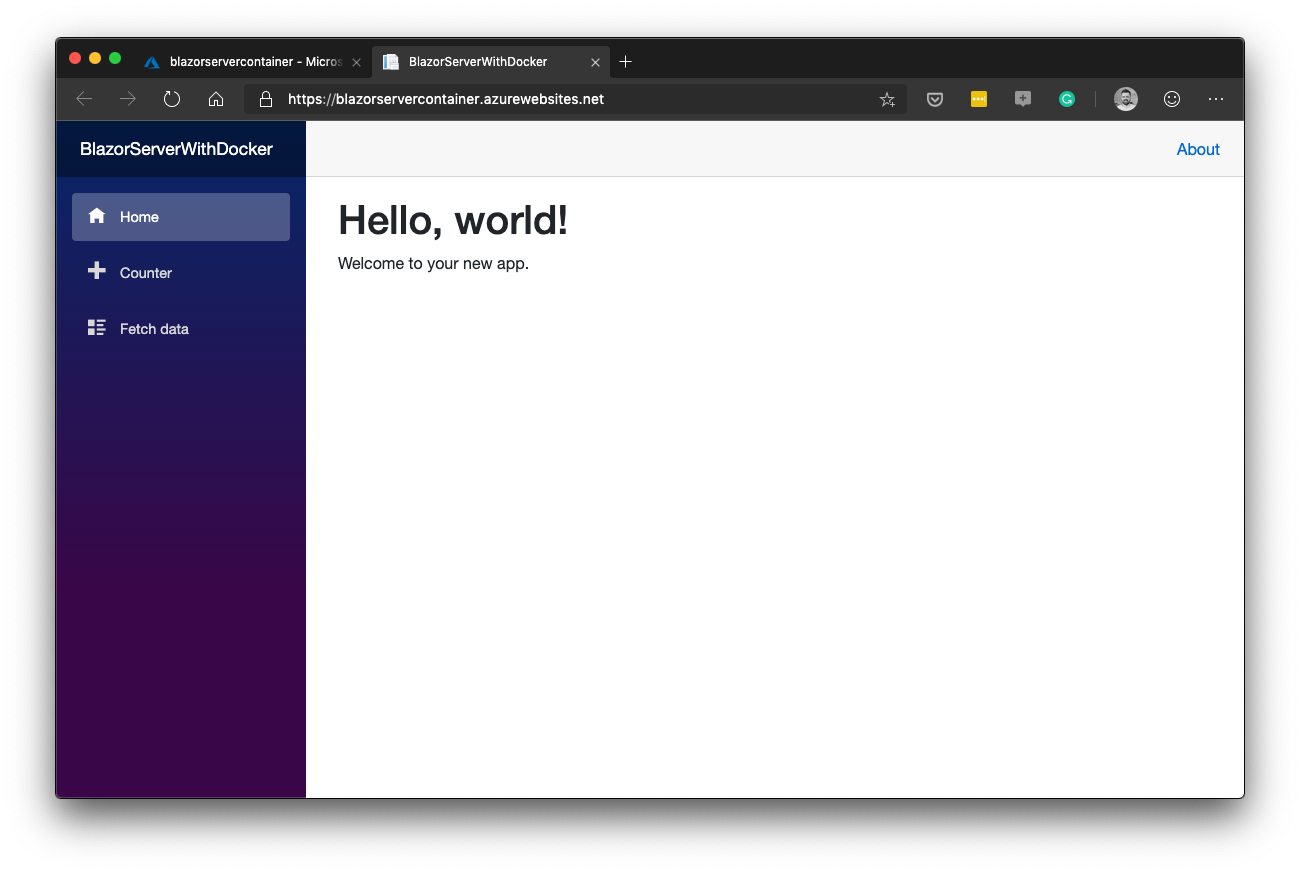
After a moment you should see a message stating Your deployment is complete. Click on the Go to resource link and you can see the overview screen for the instance. You can click on the URL link in to top right of the blade to view the running instance - This does take a few seconds to fire the app up the first time.

Congratulations, you’ve now got a fully working Blazor application running in a container on Azure!
So far so good, we have successfully deployed an image from the container registry to an app service but we don’t want to have to come here and do this manually every time we update our code.
To complete our pipeline we’re going to set up a release pipeline which will automatically deploy new images to our Web App for Containers instance.
Deploying from Azure Pipelines
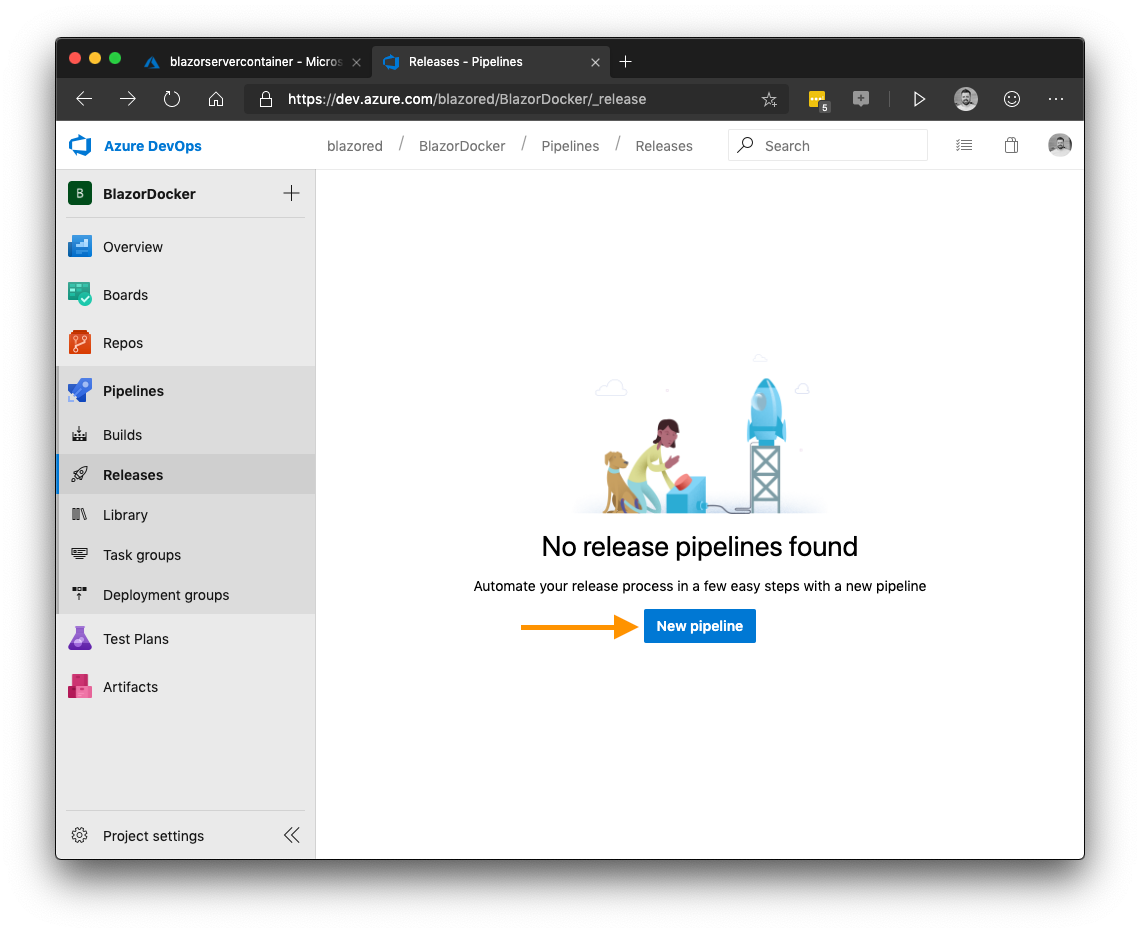
We’re going to continue where we left off in part 3. This time we’re going to head to the Releases option under the Pipelines menu. Then we’re going to click the New pipeline button.
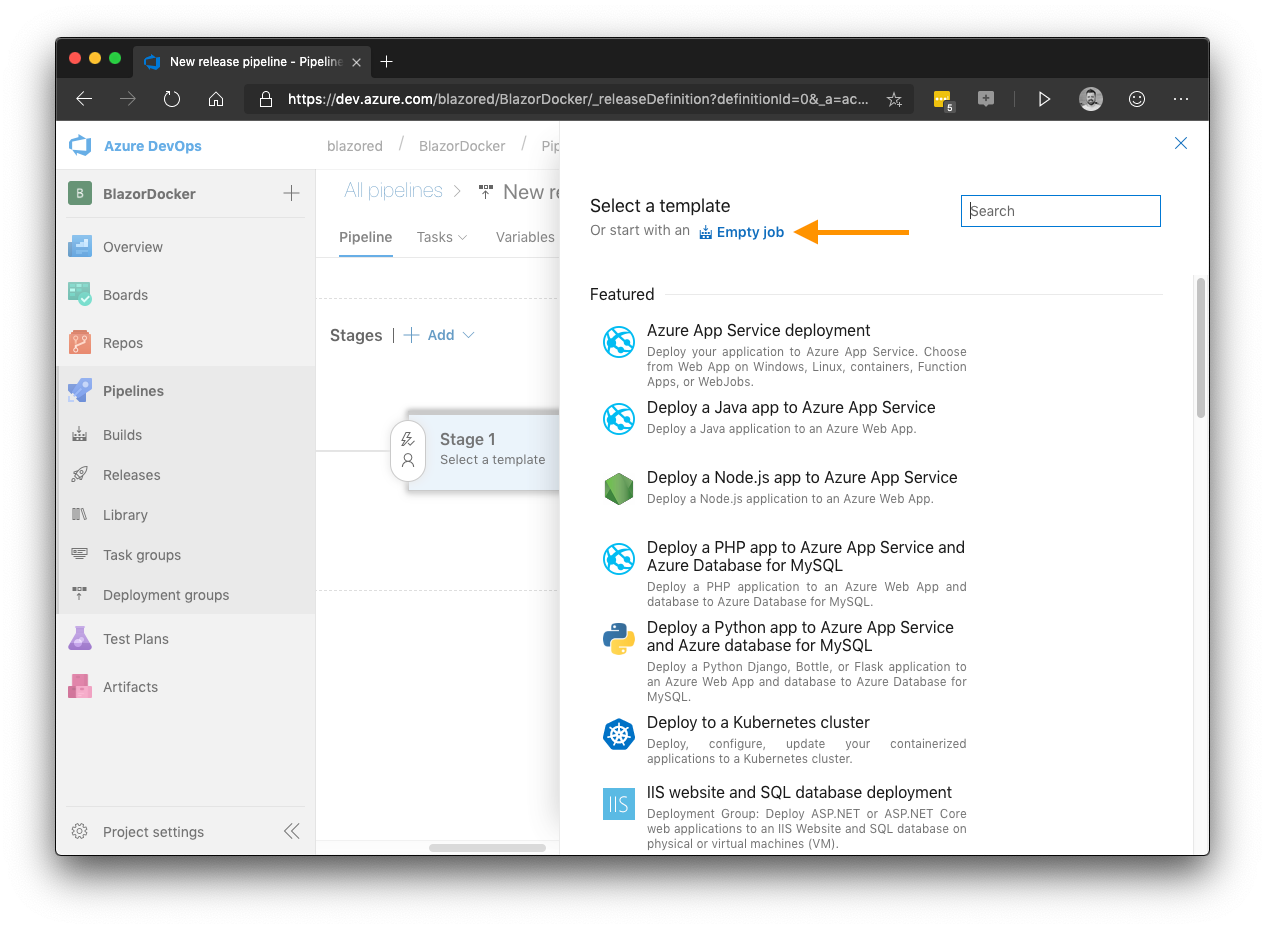
To start, we need to select a template to use for our pipeline, we’re going to select empty job here.
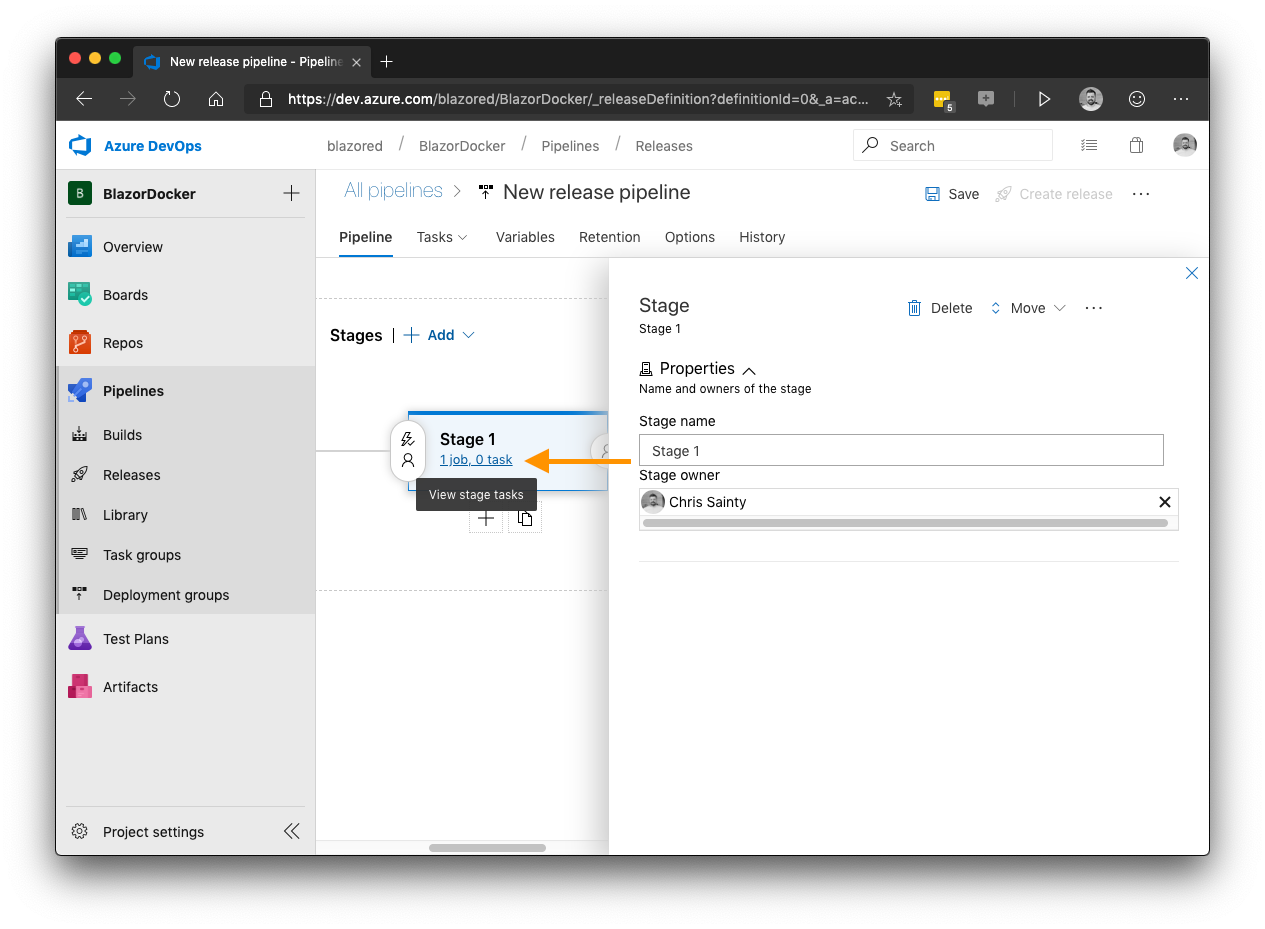
Once we select empty job we need to click the view stage tasks link in Stage 1.
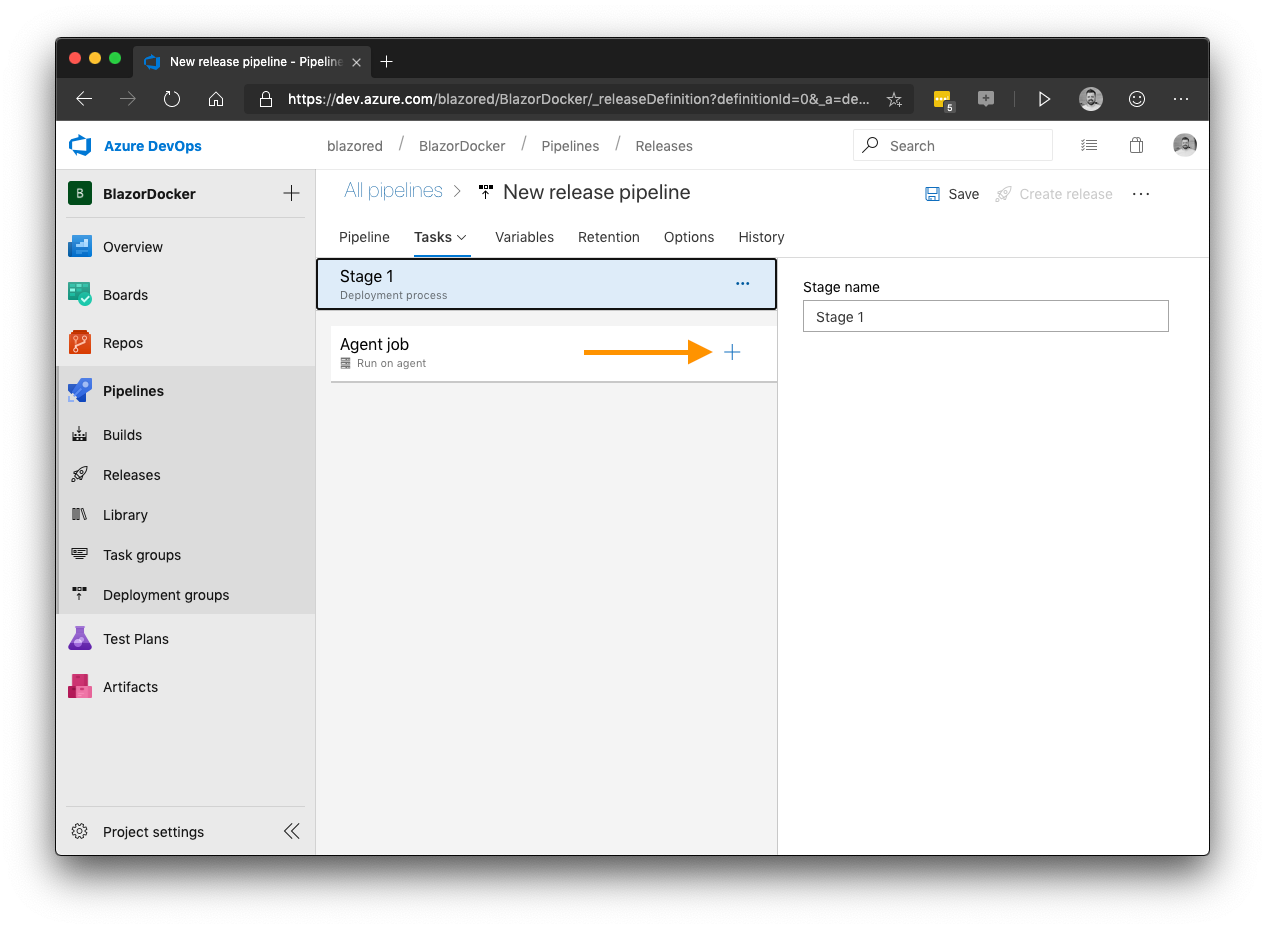
Now click the + next to agent job to add a new task.
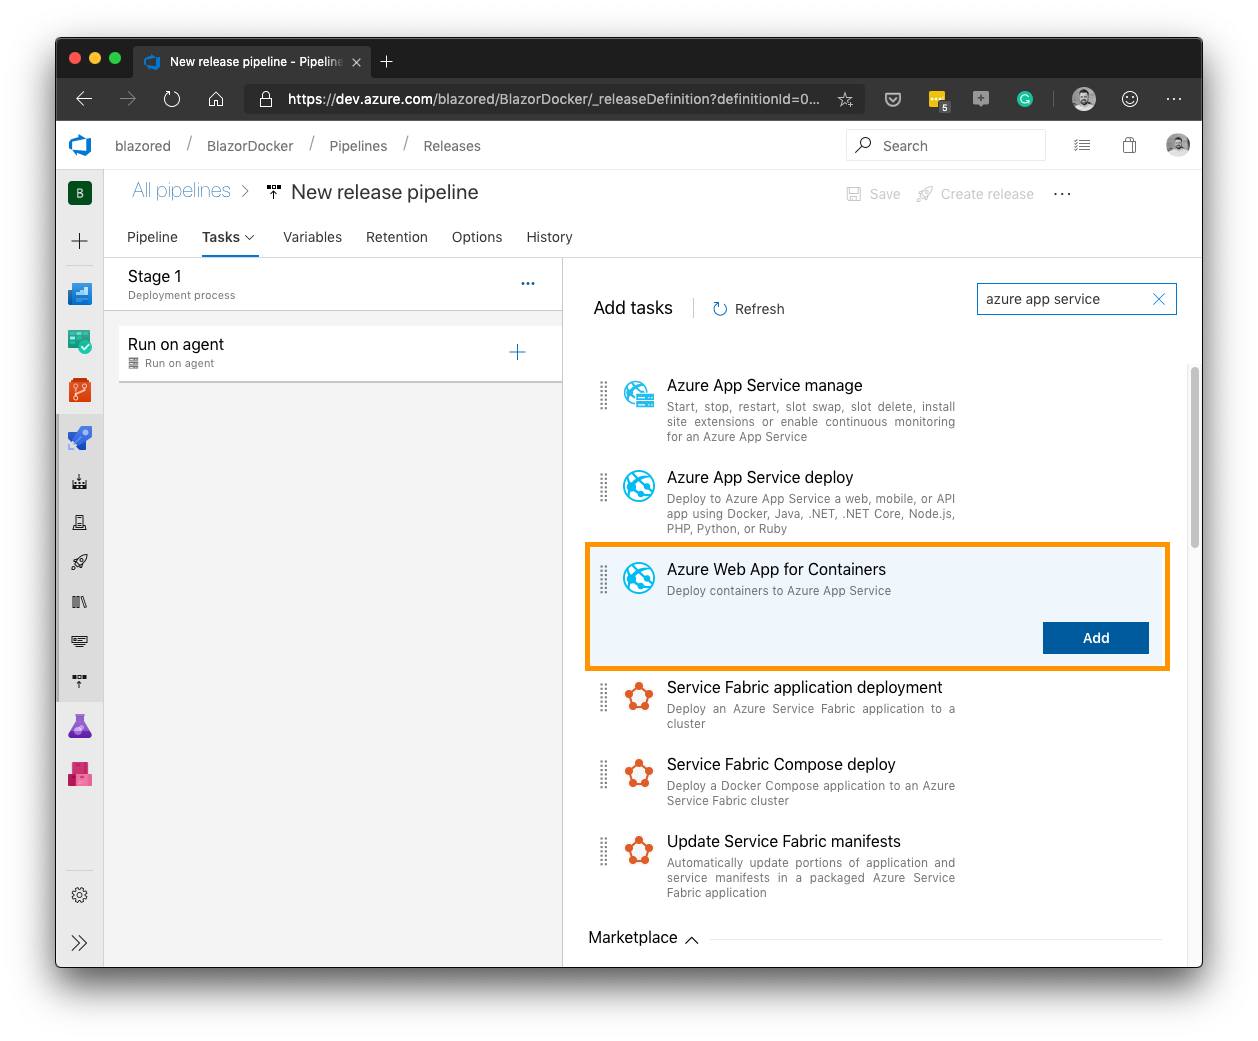
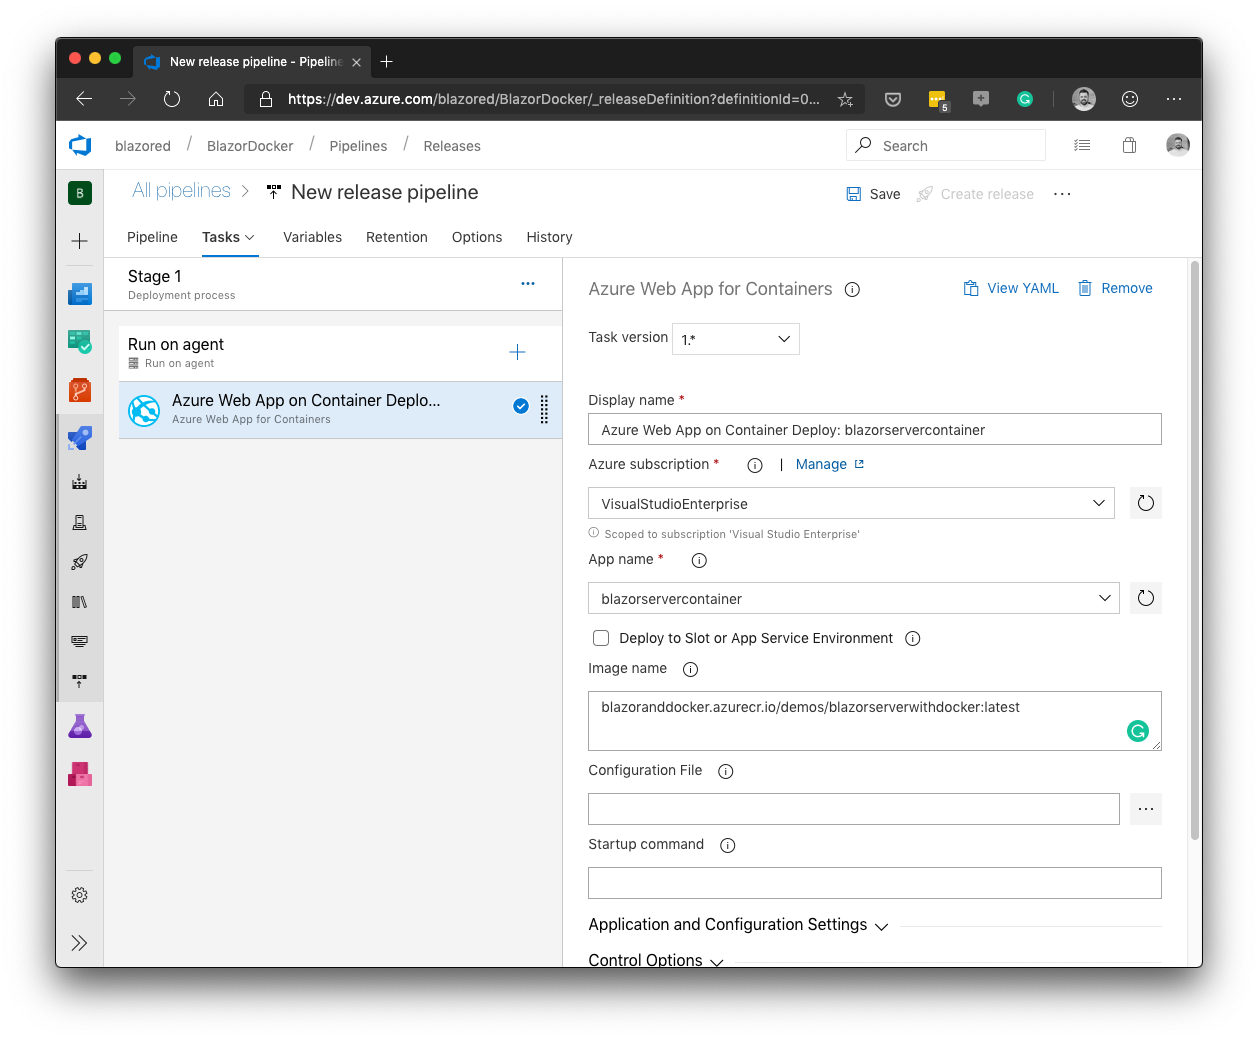
Using the add task search box, type in Azure App Service and then add the Azure Web App for Containers task.
Click on the task to load its configuration screen. Select your Azure subscription, then the app name, which is the instance we created in the first half of the post. Finally, fill in the image name, this is the fully qualified image name (your_registry.azurecr.io/repo:tag_).
The last thing we need to configure is where to get the image we are going to deploy. Click on the Pipeline tab, then in the artifacts box click Add an artifact. Then under source type click the show more link and then select Azure Container Registry.
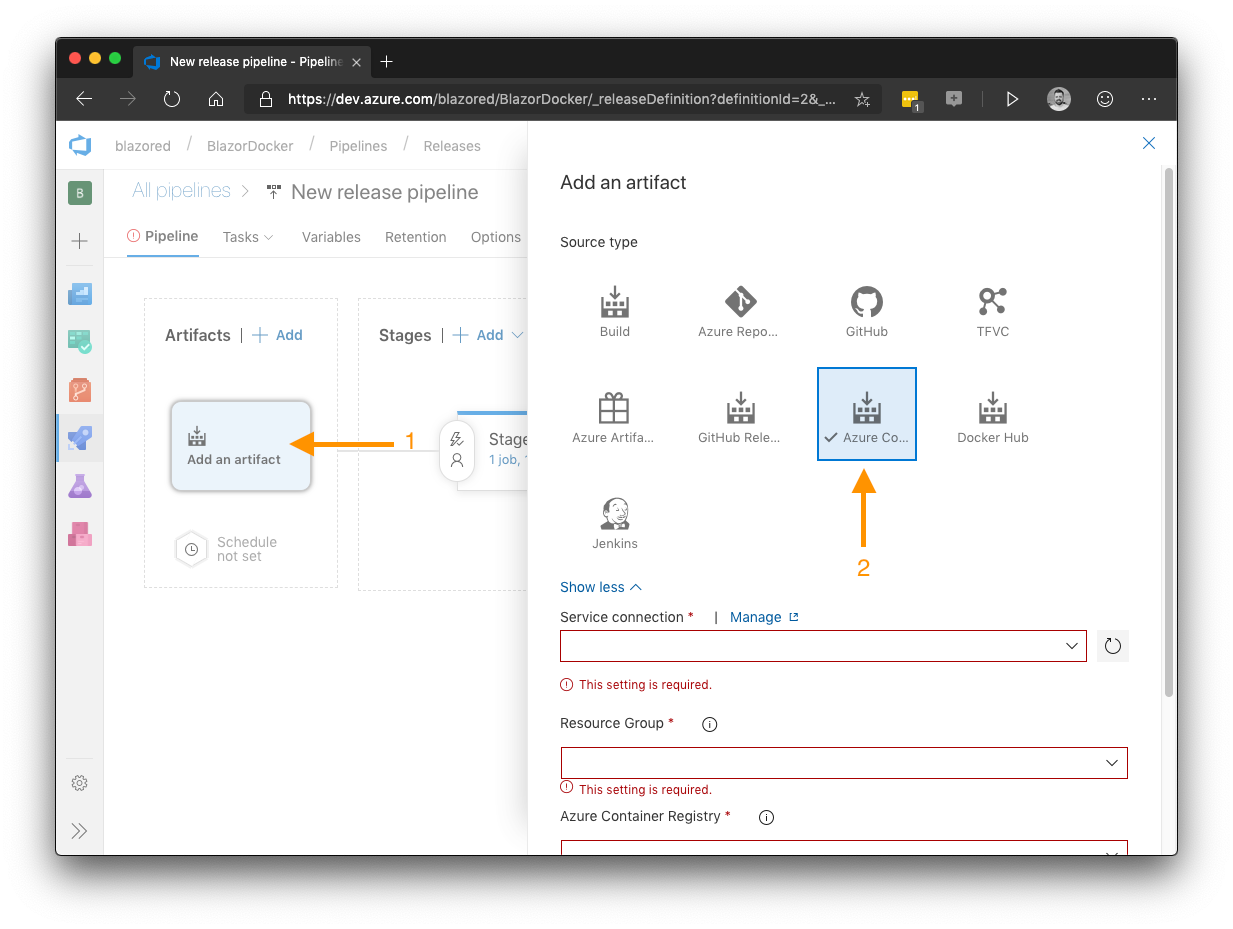
Go ahead and select your service connection, resource group, azure container registry and repository. Then click Add.
That should be everything we need. If you save your pipeline using the save button at the top of the screen, you can also give your pipeline a more meaningful name by clicking on the New release pipeline text in the top left.
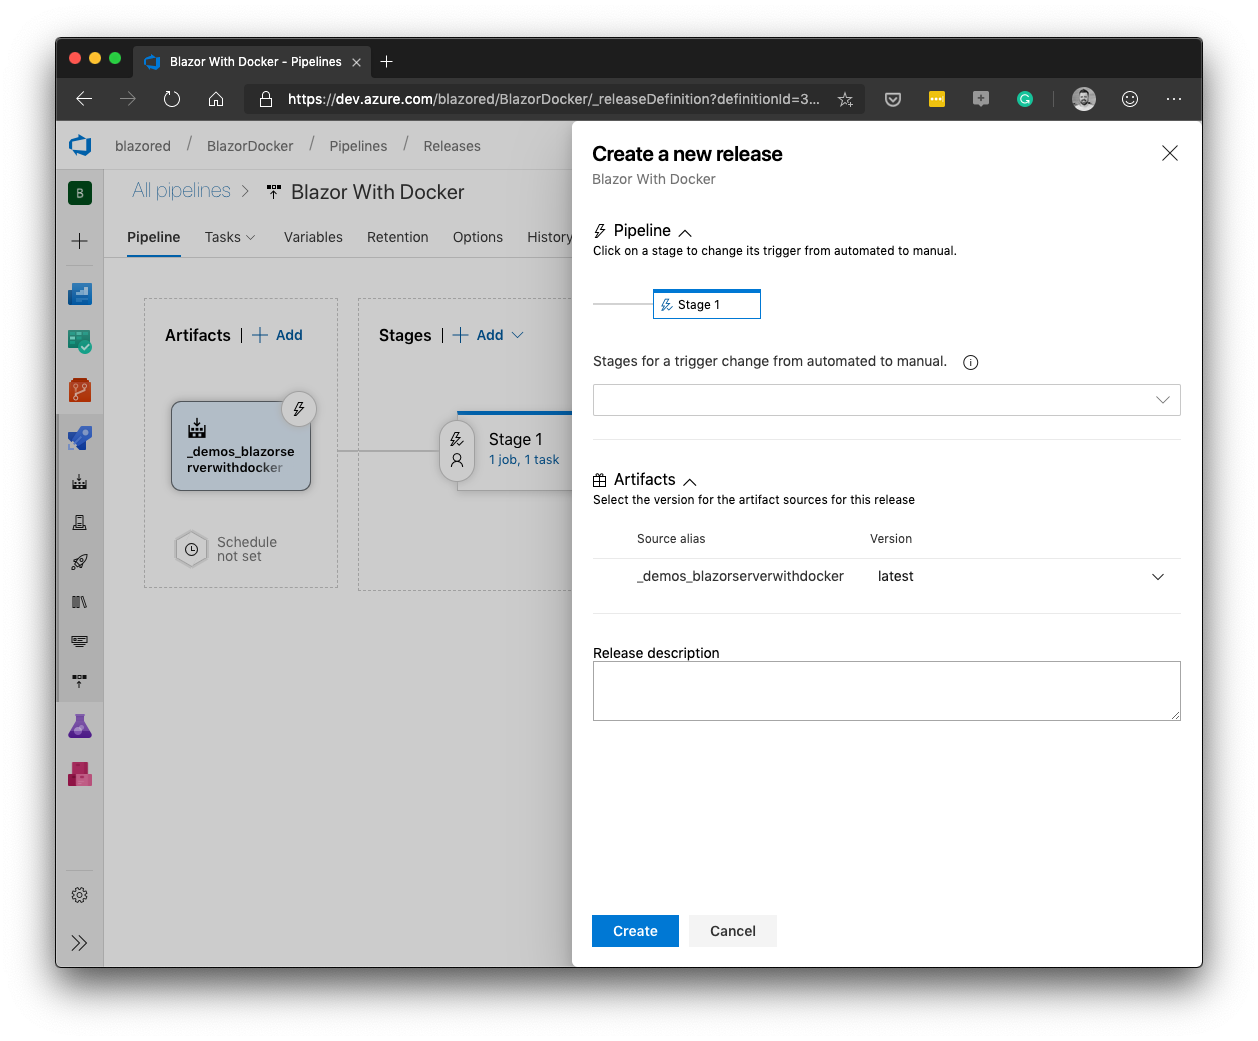
Now it’s time to test it all out. Click the Create Release button in the top right and then click the Create button to start the release.
If all goes well, after a minute or two, you should see the stage turn green with a succeeded message.
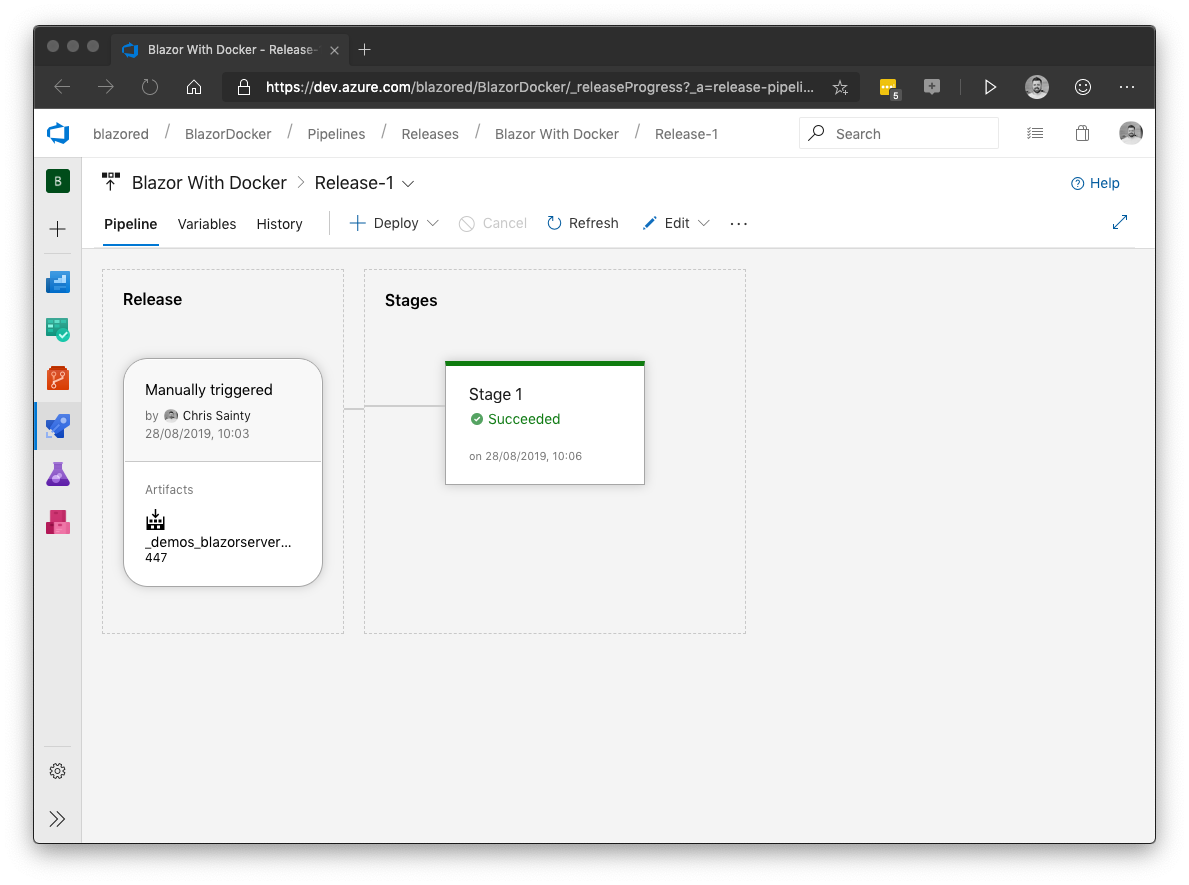
Type in the FQDN for your app instance and you should be able to see your application working.
Enabling Continuous Deployment (optional)
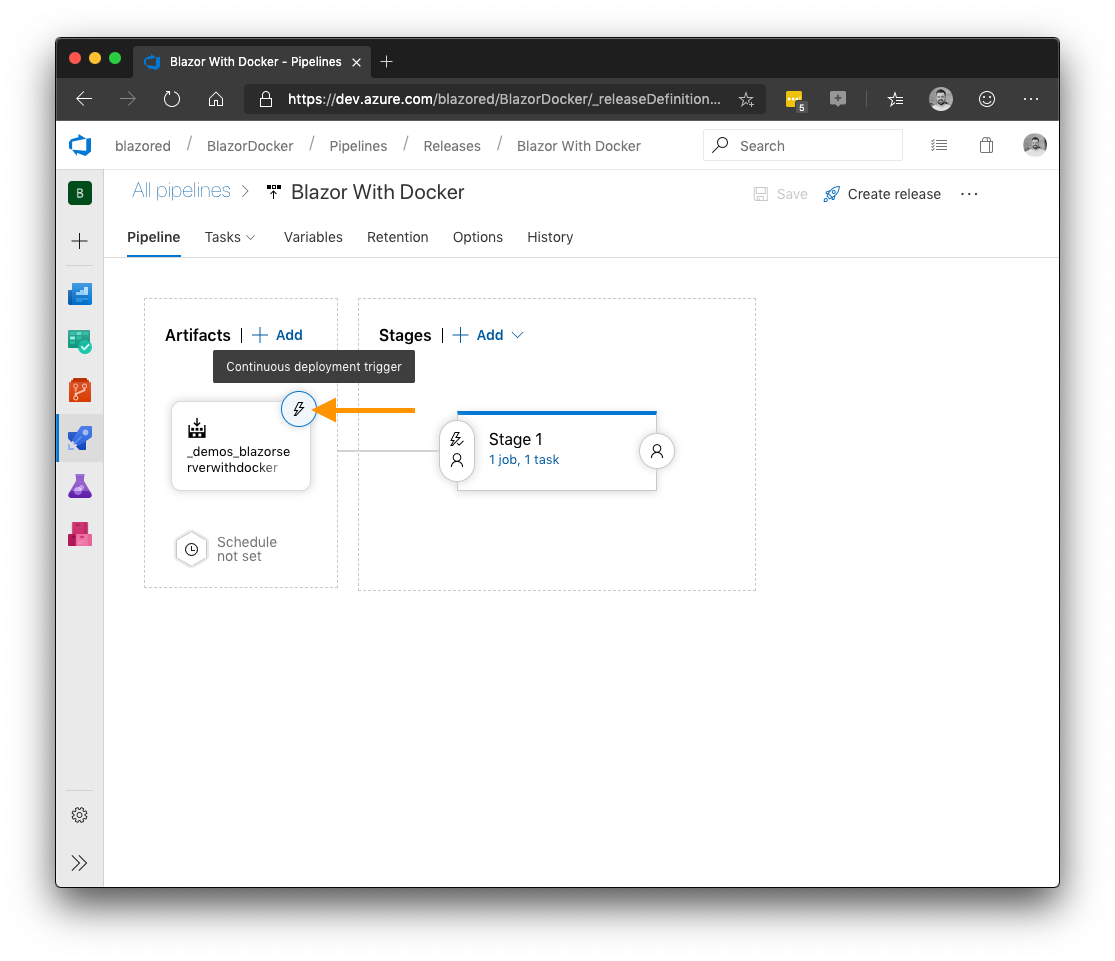
To create a full CD pipeline, then you’ll want to trigger a new deployment every-time a new image is built and pushed to the container registry repository. To enable this, edit the release pipeline and click the enable Continuous deployment trigger.
From here toggle the Enabled switch to turn on continuous deployments.
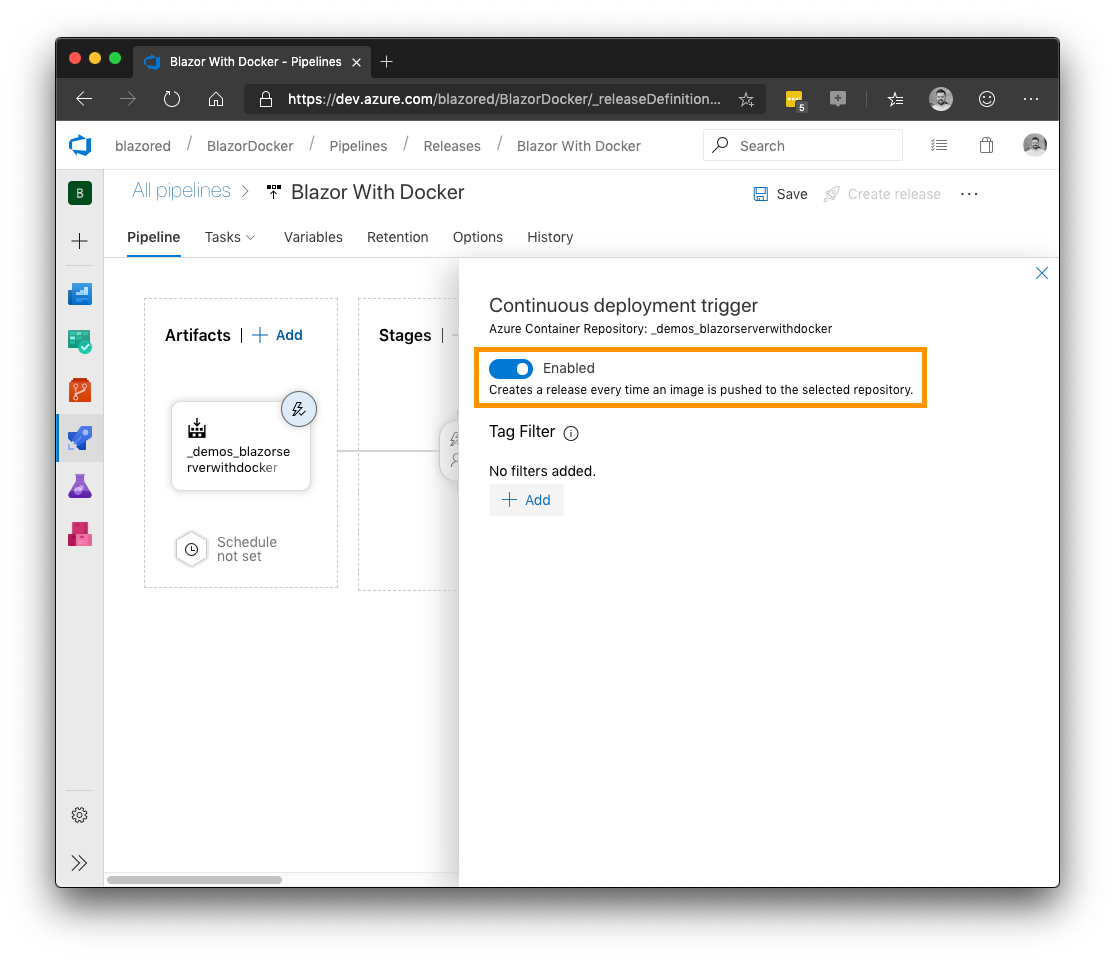
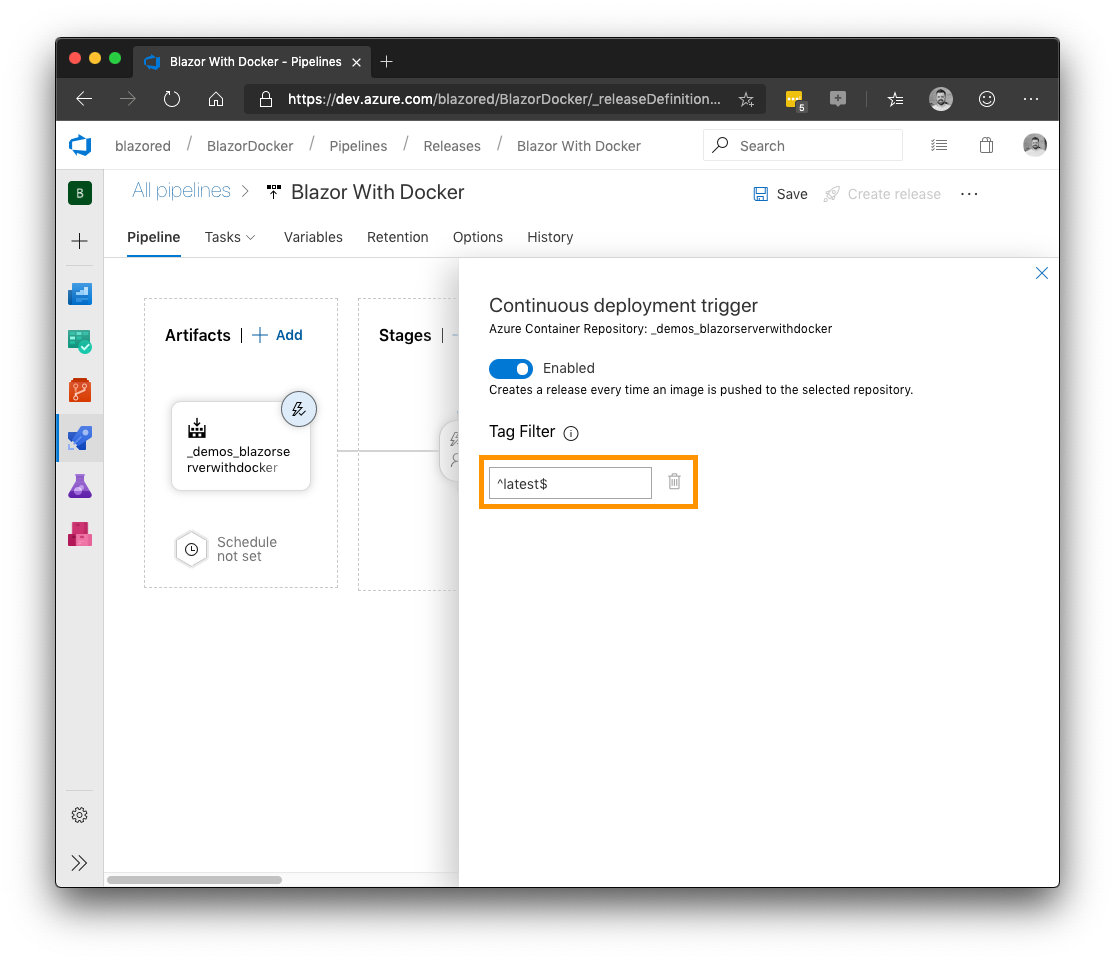
This will now create a new release automatically every-time a new image is pushed to the container registry repository. However, if you want a bit of control, say you only want to create a release when the image has a certain tag, you can add a tag filter.
This is just a regex expression, in the image below I’ve added the filter ^latest$ so that only images with a tag of latest will get deployed.
That’s it, we now have a continuous deployment pipeline configured.
Summary
In this post, we started by creating a new Web App for Containers instance using the Azure Portal. Then configuring that instance to deploy and run an image from our Azure Container Registry.
Next, we built on our CI pipeline from earlier posts, adding the ability to automatically deploy new versions to our app instance via Azure Pipelines. Then finished off with an optional step to enable full continuous deployment on our pipeline.
